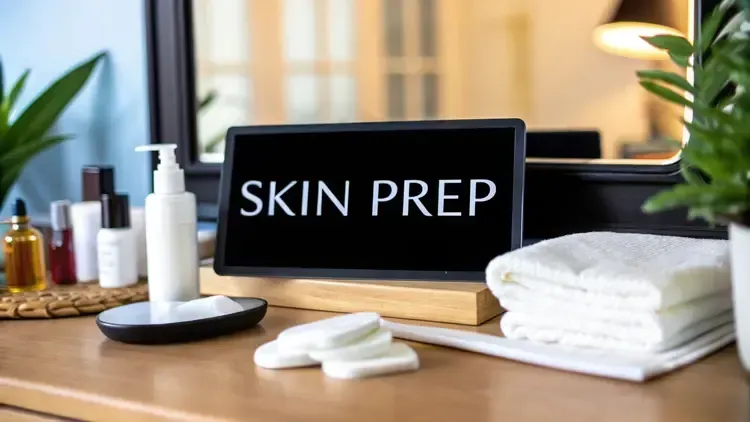
What to Do Before a Chemical Peel: Your Complete Prep Guide
Why Your Pre-Peel Preparation Can Make or Break Your Results

Let's get real for a moment. Jumping into a chemical peel without doing the prep work is like trying to run a marathon with zero training. You might cross the finish line, but it’s not going to be pretty. The time you spend preparing your skin in the weeks before your appointment is just as crucial as the peel itself. Think of it as building up your skin's strength so it can handle the intense exfoliation and recover like a champ.
The Real Cost of Skipping Prep
So, what’s the big deal if you cut a few corners? While it's tempting to rush, impatience can backfire. If your skin isn't properly conditioned, it's more vulnerable to side effects like post-inflammatory hyperpigmentation (those stubborn dark spots), persistent redness, or even scarring. Prepping your skin isn't about putting off your amazing results—it's about ensuring the results you get are the glowing, even-toned ones you’re dreaming of. A little planning goes a long way toward a smooth recovery and stunning outcome. If you want to see what's possible with proper care, take a look at these chemical peel before and after results.
Why It’s a Non-Negotiable Step
It’s no secret that chemical peels are incredibly popular for skin rejuvenation; the market is projected to hit $3.1 billion by 2026. This boom also shines a light on a critical fact: great results depend heavily on what the patient does beforehand. Clinical studies suggest that negative side effects can pop up in as many as 15-20% of cases, and these issues are often tied directly to poor pre-treatment care. That’s not meant to scare you—it’s meant to empower you. By carefully following guidance on what to do before a chemical peel, you significantly reduce these risks and make your investment pay off. For more details on this trend, you can explore the global market trends for chemical peels on Statista.com. Proper preparation ensures you become a success story, not just a statistic.
Creating Your Four-Week Skin Conditioning Timeline
Getting a chemical peel isn't something you just decide to do on a Tuesday. Think of it like training for a marathon—you wouldn't just show up on race day without any preparation. Your skin needs a proper conditioning period to build up resilience, which is a non-negotiable step if you want that amazing post-peel glow instead of a recovery nightmare.
This prep work is all about strengthening your skin's protective barrier so it can handle the intensity of the peel. Rushing this process can shock your skin, leading to irritation and other unwanted reactions. A gradual approach is your best bet for a safe and effective treatment.
The Four-Week Framework
So, what does this training look like? Most professionals recommend a two to four-week prep window. During this time, your main goals are to fortify your skin's barrier and gently introduce ingredients that will help the peel work its magic. This means doubling down on hydration and being absolutely religious about sunscreen.
At the same time, you'll need to strategically press pause on certain products. For example, it's crucial to stop using retinoids, physical scrubs, and other strong exfoliants about a week before your appointment to avoid over-sensitizing your skin. The timing and preparation are key to the procedure's success, a factor contributing to the growth of the chemical peel market as detailed on grandviewresearch.com.
The Final Countdown: The Last 72 Hours
As your appointment gets closer, your skincare routine should get simpler. The last three days are all about calming, hydrating, and protecting. Your mission is to get your skin into a stable, healthy state, ready for the main event. No new products, no harsh ingredients—just gentle care.
To help you map out your pre-peel journey, here is a detailed schedule outlining what you should be doing in the weeks leading up to your appointment.
Pre-Chemical Peel Timeline and Actions
A detailed breakdown of what to do during each week leading up to your chemical peel.
Timeline Action Required Purpose What to Expect 4 Weeks Out Consult a professional, start a gentle skincare routine (cleanser, moisturizer, SPF 30+). To establish a baseline and strengthen the skin barrier. Your skin should feel balanced and hydrated. No major changes yet. 2 Weeks Out Introduce a tyrosinase inhibitor (like kojic acid or azelaic acid) if recommended. Maintain the core routine. To prevent post-inflammatory hyperpigmentation (PIH). You might notice a slight brightening, but the main goal is prevention. 1 Week Out Stop all exfoliation: no retinoids, AHAs, BHAs, or physical scrubs. To prevent over-exfoliation and irritation. Your skin might feel less "active" but should remain calm and comfortable. 72 Hours Out Focus solely on gentle cleansing, hydrating, and sun protection. Avoid waxing, threading, or hair removal on the face. To ensure the skin is calm, non-irritated, and fully prepped for the peel. Your skin should be in a neutral, healthy state, ready for treatment.
This timeline clearly shows the shift from active preparation to protective care. By following this schedule, you ensure your skin is in the best possible condition for your treatment.
Here’s a simple visual guide for those critical final days before your peel:

As the infographic highlights, the day before your appointment, your only job is to keep your skin clean and moisturized. This focused, gentle approach is the final step in ensuring your chemical peel is both safe and successful, setting you up for beautiful results.
Finding the Right Provider and Setting Realistic Expectations
The success of your chemical peel doesn't just come down to your prep work—it's equally about the hands you're putting your face in. Let's be real: not all peels or providers are the same, and picking the wrong one can turn a promising treatment into a serious setback. The goal is to find an experienced, licensed professional who understands skin on a chemical and biological level, not just someone with a tempting bargain.
A cheap peel is almost always a red flag. When you cut corners on cost, you're likely also cutting corners on expertise, safety, and quality ingredients. This can lead to disastrous results like burns or scarring, and your face is definitely not the place to bargain hunt.
Vetting Your Practitioner
Think of your consultation as an interview where you're the one in charge of hiring. A qualified provider, whether a licensed esthetician or a dermatologist, will perform a thorough skin analysis, go over your medical history, and ask about your lifestyle. They should be able to clearly explain why they're recommending a specific type of peel just for you.
Here are a few essential questions you should absolutely ask:
How many chemical peels have you actually performed?
What kind of training and certifications do you have?
Can you show me before-and-after photos of your own clients who have a similar skin type and concerns to mine?
What's your plan if an adverse reaction happens?
You're listening for confident, detailed answers. If you get vague responses or feel rushed into booking, consider those warning signs. An experienced professional will also keep it real, managing your expectations about results and how long it will take. They won't promise you a miracle overnight. If it sounds too good to be true, it probably is. A trustworthy provider focuses on safe, sustainable results, not just a quick fix.
For those ready to find an expert, you can explore scheduling a professional chemical peel consultation here. Making an informed choice is the most important first step you can take.
Mastering Product Elimination Without Sabotaging Your Skin
Getting your skin ready for a chemical peel means doing a little spring cleaning on your bathroom counter. The idea is to pause any products that could mess with your treatment or leave your skin feeling angry and irritated. It's not just about what you stop using, but also when you stop, so your skin isn't overly sensitive on peel day.
Think about it like this: many of your go-to active ingredients are like personal trainers for your skin, pushing it to turn over cells faster. But you wouldn't run a marathon the day after a grueling workout, right? In the same way, you need to let your skin rest from these power-packed products before a professional peel.
The Obvious and Not-So-Obvious Culprits
Everyone knows to take a break from the heavy-hitting exfoliants. This list usually includes:
Retinoids: This covers everything from over-the-counter retinol to prescription Tretinoin and Adapalene.
Alpha-Hydroxy Acids (AHAs): Think glycolic acid and lactic acid.
Beta-Hydroxy Acids (BHAs): The most common is salicylic acid.
Physical Scrubs: Anything with gritty bits or beads needs to go on vacation.
As a general rule, you should stop using these at least one week before your appointment. But some products that seem innocent can hide exfoliants or irritants. It's a good idea to play detective with your product labels and look out for things like benzoyl peroxide or even high levels of certain botanical extracts that can be sensitizing.
An ingredient dictionary can be your best friend here, helping you decipher what's actually in your bottles and jars.

This kind of tool breaks down what each ingredient does, making it much easier to flag anything that might cause a problem.
Instead of quitting everything cold turkey, which can sometimes confuse your skin, try tapering off stronger products if you use them daily. Swap them out for simple, hydrating alternatives to keep your skin barrier strong and calm. If you need some inspiration for peel-safe skincare, you might find this curated list of products helpful for building a gentle routine. This careful approach is a key part of setting yourself up for a successful chemical peel.
Sun Protection Strategies That Actually Work in Real Life

Everyone tells you to wear sunscreen before a peel, but let's be honest—knowing you should and actually doing it effectively are two different things. Consistent sun protection is one of the most important parts of figuring out what to do before a chemical peel. It directly lowers the risk of post-treatment issues like hyperpigmentation. In fact, a single day of major sun exposure can be enough for your provider to postpone your appointment.
Choosing Your Pre-Peel Armor
Not all sunscreens are created equal, especially for skin that’s being prepped for a procedure. Your best bet is a broad-spectrum, mineral-based sunscreen with an SPF of 30 or higher. Keep an eye out for active ingredients like zinc oxide and titanium dioxide. These ingredients physically block UV rays instead of absorbing them through a chemical reaction, which makes them much less likely to irritate skin that’s already in a sensitive state.
It's also a good idea to avoid sunscreens loaded with fragrance or alcohol, as they can be drying and cause inflammation. Think of your sunscreen as a non-negotiable final step in your routine every single morning, whether it's sunny or cloudy.
Making Reapplication Realistic
The biggest hurdle for most people is reapplication, especially if you wear makeup. This is where a powder or spray sunscreen can be a total game-changer. Just keep one in your bag for quick touch-ups during the day. For example, if your desk is near a sunny window at the office, a quick dusting of powder SPF at lunchtime can make all the difference.
The goal isn't perfection; it's consistency. Building these simple, real-world habits ensures your skin shows up to your appointment calm, protected, and ready for its renewal.
Patch Testing and Final Week Preparations
As your chemical peel appointment gets closer, the final week is all about protecting your skin and paving the way for a smooth recovery. This is when the patch test becomes your best friend. It’s much more than just a formality; it’s a crucial safety check to see how your skin will react to the specific acid your provider plans to use.
Think of it as a dress rehearsal for your face. It gives both you and your provider a sneak peek, helping to dodge any widespread irritation or an unexpected allergic reaction. Your practitioner will apply a tiny amount of the peel solution to a discreet spot, usually behind your ear or along the jawline, and watch for any red flags.
Final Week Adjustments and Day-Of Prep
This last week before your treatment also requires a few temporary tweaks to your routine. One of the most important conversations you'll have with your provider is about the medications and supplements you're currently taking, as some can interfere with the healing process.
Before we get into the nitty-gritty, here’s a quick-reference table of common things you might need to pause. Always confirm this list with your own provider, as your personal health history is unique.
Common Medications and Supplements to Avoid
A comprehensive list of medications and supplements that may need to be discontinued before a chemical peel.
Medication/Supplement Why to Avoid When to Stop Alternatives Blood Thinners (Aspirin, Ibuprofen) Increases the risk of bruising and bleeding during and after the peel. 5-7 days before the peel. Acetaminophen (Tylenol) is generally safer for pain relief. Certain Antibiotics Some types can make your skin extra sensitive to light (photosensitivity). Varies by drug; discuss this with your provider. Your provider might suggest a different antibiotic if needed. Vitamin A/Retinoids These powerful topicals increase skin sensitivity and potential irritation. At least 1 week before the peel. Stick to gentle, hydrating serums without active ingredients. St. John's Wort This herbal supplement is known to cause photosensitivity. 1-2 weeks before the peel. Talk to your doctor about other options for managing anxiety.
This table covers the most common culprits, but be sure to give your provider a full list of everything you take, including prescriptions, over-the-counter meds, and herbal supplements. Transparency is key to a safe procedure.
On the day of your appointment, the goal is to show up as a blank canvas. Arrive with a clean, makeup-free face. I also recommend wearing comfortable clothing, especially a button-up or zip-up shirt that you won’t have to pull over your head and potentially irritate your freshly treated skin.
Finally, a little pro-tip: get your post-peel sanctuary ready at home before you leave for your appointment. Lay out your gentle cleanser, heavy-duty moisturizer, and some fresh, clean pillowcases. Doing this simple prep work ahead of time means you can come home and focus completely on relaxing and healing.
Your Complete Pre-Peel Success Checklist
To walk into your chemical peel appointment feeling totally at ease, having a clear game plan is a huge help. This isn't about adding more to your to-do list; it’s about feeling in control and making sure all the little details are handled. That way, you can just get excited about the amazing results to come. Think of this as your guide to what to do before a chemical peel, broken down into simple, manageable pieces.
Your Final Week Action Plan
The last seven days before your treatment are when your prep work really shines. Here’s a quick rundown of what you should be focusing on as your appointment gets closer.
Simplify Your Skincare: At this point, your routine should be as basic as possible. Stick to a gentle, non-foaming cleanser, a simple hydrator or moisturizer, and the most critical item: a mineral-based sunscreen with SPF 30 or higher. This is non-negotiable.
Chat with Your Provider About Meds: Double-check with your esthetician or dermatologist about any medications and supplements you need to pause. This often includes common things like aspirin and ibuprofen, but also herbal supplements like St. John’s Wort, which can make your skin more sensitive or increase bleeding risk.
Create Your Recovery Sanctuary: Get all your post-peel essentials ready before you go to your appointment. Have your gentle skincare, clean towels, and fresh pillowcases laid out and waiting. You'll be so thankful you prepped this ahead of time when all you want to do is relax.
The Day Before and Day Of
The final 24 hours are all about keeping your skin calm and protected. The night before your appointment, just do a simple cleanse and moisturize. On the day of the peel, show up with a completely clean face—no makeup, no serums, nothing. It’s also a good idea to wear a comfortable shirt that doesn't pull over your head, like a button-up or a zip-front jacket. Following these simple steps sets you up for a smooth procedure and a beautiful, healthy recovery.
Ready to take the next step toward radiant skin with a professional you can trust? The experts at Olive Skin Therapy are here to create a personalized treatment plan just for you.