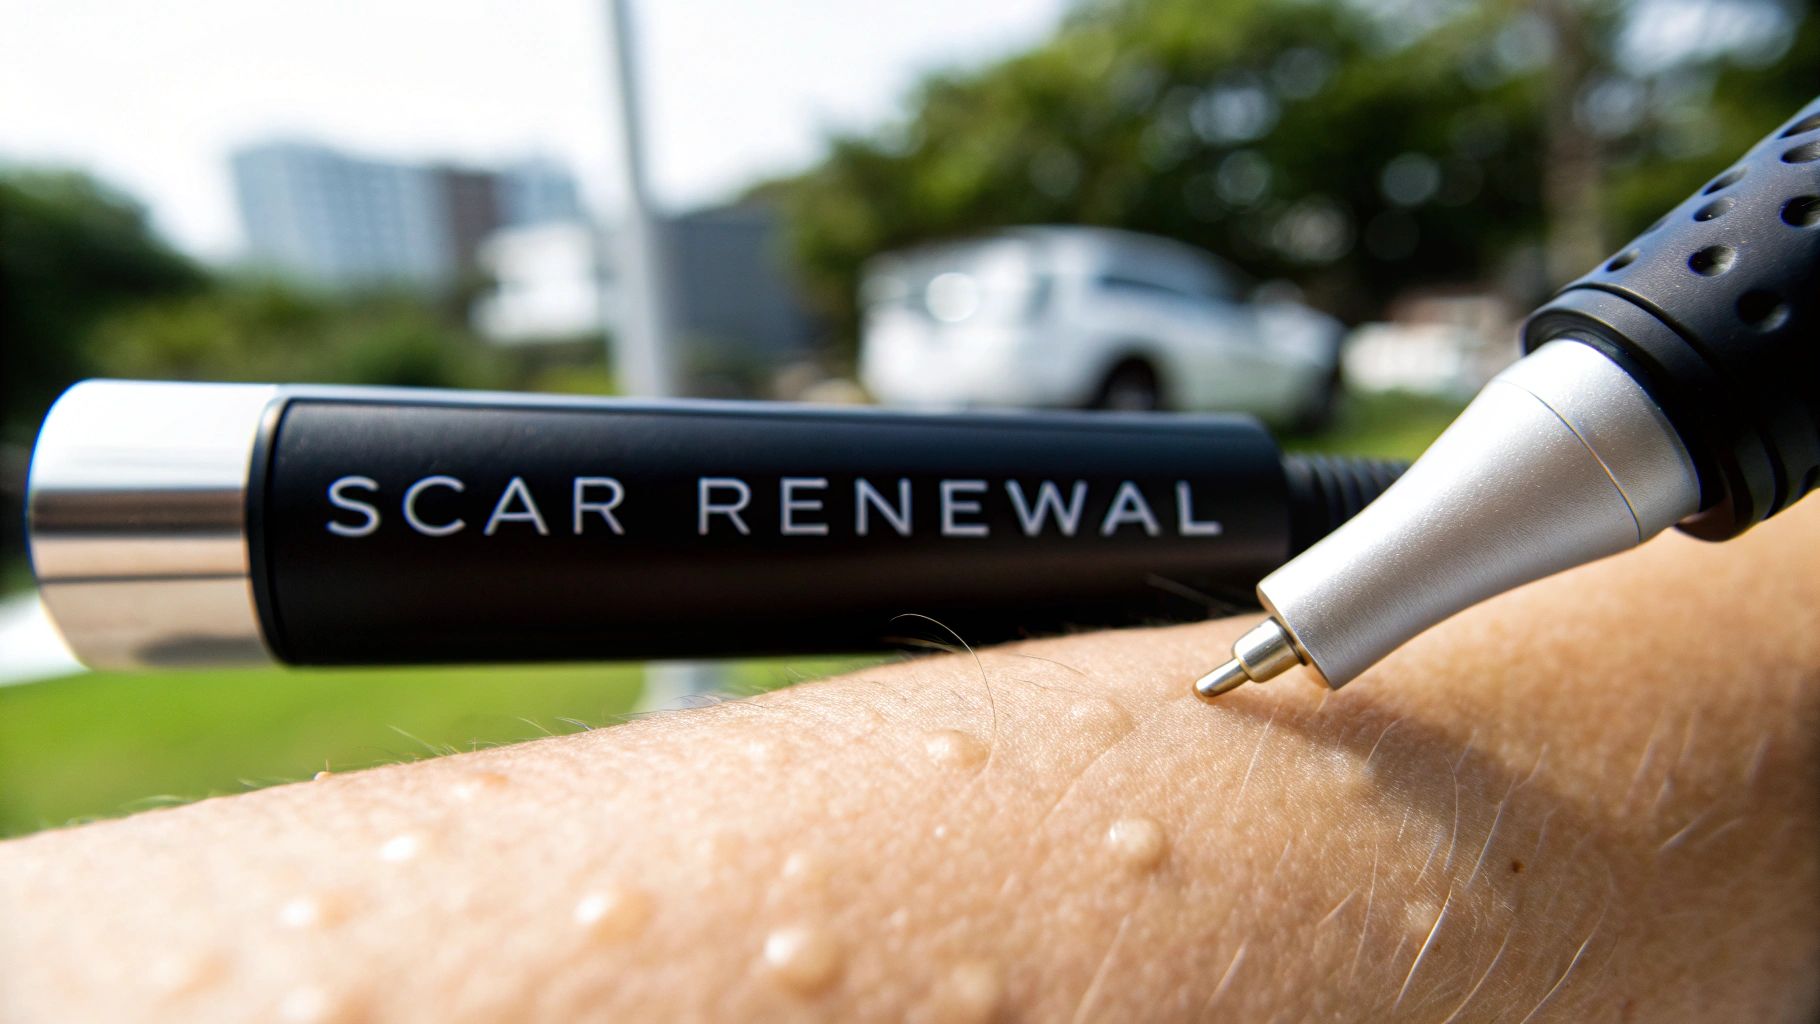
A Guide to Collagen Induction Therapy for Acne Scars
So, you're looking for a way to tackle those lingering indented acne scars? You’ve probably come across the term collagen induction therapy, or as it's more commonly known, microneedling. This is a seriously effective, minimally invasive treatment that helps smooth out those pitted scars by getting your skin to heal itself from the inside out.
How Microneedling Actually Heals Acne Scars
To really get how microneedling works for acne scars, think about what a scar actually is. When a bad breakout damages the deeper layers of your skin, the collagen and elastin that act as its support structure get destroyed. What you're left with is an indentation—a "pockmark"—because that underlying scaffolding is gone.
Microneedling doesn't try to fill that dip with a synthetic product or sand down the surrounding skin. Instead, it cleverly tricks your body into rebuilding that broken foundation all on its own. It's all about tapping into your skin's natural ability to repair itself.
Here's a quick look at the core details of the treatment.
Collagen Induction Therapy for Acne Scars at a Glance
| Aspect | Description |
|---|---|
| Treatment Goal | To reduce the depth and appearance of atrophic (indented) acne scars. |
| How It Works | Creates controlled micro-injuries to trigger the body's natural collagen production. |
| Mechanism | Stimulates a wound-healing response that rebuilds the skin's support structure. |
| Best For | Rolling scars, boxcar scars, and some shallow ice pick scars. |
| Typical Downtime | 1-3 days of redness and mild swelling, similar to a sunburn. |
| Sessions Needed | Usually 3-6 sessions, spaced 4-6 weeks apart. |
| Results Timeline | Initial improvements seen in weeks, with full results appearing over 3-6 months. |
This table gives you the basics, but the real magic is in the process itself.
Triggering Your Skin’s Healing Response
The procedure involves a specialized tool equipped with dozens of ultra-fine, sterile needles. When passed over the skin, this device creates thousands of tiny, controlled punctures in the dermis—the layer where scars actually form. These micro-channels are just deep enough to set off a healing alarm without causing any real damage.
Your body immediately responds with a three-phase healing cascade:
Phase 1: Inflammation. Right away, your skin sends a rush of blood and restorative cells to the treated areas. This is the cleanup crew, and it's why your face looks red and feels warm, almost like you got a little too much sun.
Phase 2: Proliferation. A few days later, the rebuilding starts. Your body's fibroblast cells get the signal to kick into high gear, and they begin churning out brand new collagen and elastin. These are the key proteins that give your skin its firm, plump, and bouncy quality.
Phase 3: Remodeling. This is the long game. Over the next several weeks and months, all that new collagen gets organized and strengthens. This fresh, robust support matrix gradually lifts the base of the scar from underneath, bringing it closer to the level of the surrounding skin.
A great way to think about it is like aerating a lawn. When you poke small holes in compacted soil, you allow air, water, and nutrients to get in, which encourages new, healthy grass to grow. The result is a fuller, more even lawn. Microneedling does the same for your skin's foundation.
This internal rebuilding is why the results look so natural. You're not adding anything foreign; you're just restoring what was lost. Research consistently backs this up, showing that microneedling leads to dramatic improvements by promoting dermal collagen remodeling.
One study, for instance, saw patients achieve a 15-20% improvement in scar appearance and a 20-25% boost in skin texture just one month after their first session. More importantly, it confirmed a significant increase in new collagen over three months. If you want to dive into the science, you can check out the detailed microneedling study published on ncbi.nlm.nih.gov.
Ultimately, collagen induction therapy gives your skin a chance to fix its own damaged architecture. By methodically rebuilding the support structure, it smooths out indentations and helps you achieve a much more even complexion.
Which Acne Scars Respond Best to Microneedling?
Collagen induction therapy is a fantastic tool for skin remodeling, but it’s not a one-size-fits-all fix for every scar. Its real power lies in treating scars that are indented—what we call atrophic scars. The entire point of the treatment is to build new tissue from the inside out to fill in those depressions.
Imagine your skin is a landscape. Atrophic scars are the little valleys and divots. Microneedling's job is to kickstart new growth from the floor of those valleys, slowly raising them until they’re level with the surrounding terrain. This makes it a go-to solution for the most common types of indented acne scars.
Atrophic Scars: The Ideal Candidate
Atrophic scars happen when your skin doesn't create enough collagen as it heals from a bad breakout, leaving a sunken-in patch of skin. We usually see them in three main forms, and all of them can improve dramatically with collagen induction therapy.
Rolling Scars: These have soft edges and give the skin a wavy, uneven texture. It’s caused by bands of tissue under the skin that are pulling the surface down. Microneedling helps by physically breaking up these tethers and triggering a new, uniform layer of collagen to smooth everything out.
Boxcar Scars: You'll recognize these by their broad shape and sharp, well-defined edges, a bit like chickenpox scars. They can be shallow or deep. Microneedling is brilliant for boxcar scars because it helps build up the base of the scar, softening those harsh edges and making the whole area less noticeable.
Ice Pick Scars: These are the deep, narrow scars that look like the skin was punctured with a tiny, sharp object. They’re often the trickiest to treat because of how deep they go. While microneedling can definitely make them look better by building collagen at the base and narrowing the opening, the deepest ones might need to be treated alongside other therapies for the best results.
Collagen induction therapy essentially brings in the raw materials (collagen) and the construction crew (fibroblasts) to rebuild a damaged foundation. For these indented scars, the treatment literally pushes the depressed skin back up, creating a smoother, more even surface.
By creating thousands of controlled micro-injuries, the treatment sets off a powerful regenerative response that fills in these depressions from below. This new collagen framework restores the volume and support that was missing, which is why you see such a visible improvement in scar depth and overall skin texture. You can learn more about this in our full guide on microneedling for acne scars.
Why Microneedling Isn't for Raised Scars
Now, on the flip side, we have hypertrophic and keloid scars. These are raised scars that form when the body goes into overdrive and produces too much collagen while healing.
- Hypertrophic Scars: These are thick, raised scars, but they stay within the boundaries of the original acne lesion.
- Keloid Scars: These are more aggressive. They don’t just stay put—they grow beyond the original spot, forming firm, sometimes large growths on the skin.
With these scars, the problem is an excess of collagen. Using a treatment designed to stimulate more collagen would just be adding fuel to the fire. It could make the raised scars even bigger and more prominent. This is why people who tend to form keloids or hypertrophic scars usually aren't good candidates for microneedling.
Getting this distinction right is crucial for setting realistic expectations. Collagen induction therapy is specifically designed to fix the "collagen deficit" of indented, atrophic scars—not the "collagen surplus" you find in raised ones.
Your Journey Through a Microneedling Session
Thinking about any new treatment can be a mix of excitement and nerves. To help put your mind at ease, let’s walk through what a typical microneedling session for acne scars actually involves from start to finish. Knowing what to expect demystifies the whole thing and helps you feel much more comfortable.
The Initial Prep Work
Your session kicks off the moment you settle in. The first and most important step is always preparing your skin to make sure the treatment is safe, comfortable, and gets you the best possible results.
A Deep Cleanse: Your practitioner will start by gently but thoroughly cleansing your face. This isn't just a quick wipe—it's about removing every trace of makeup, oil, and surface grime to create a completely sterile canvas. It’s a non-negotiable step to prevent any chance of infection.
Applying Numbing Cream: Next, a topical anesthetic cream is applied generously over the areas we'll be treating. This cream usually needs about 30 to 45 minutes to work its magic. While you wait, you can just relax. The numbing agent is key to making the procedure comfortable; most people just feel a light vibration or a mild prickling sensation later on.
Once your skin is numb, the cream is wiped away, and we’re ready for the main event.
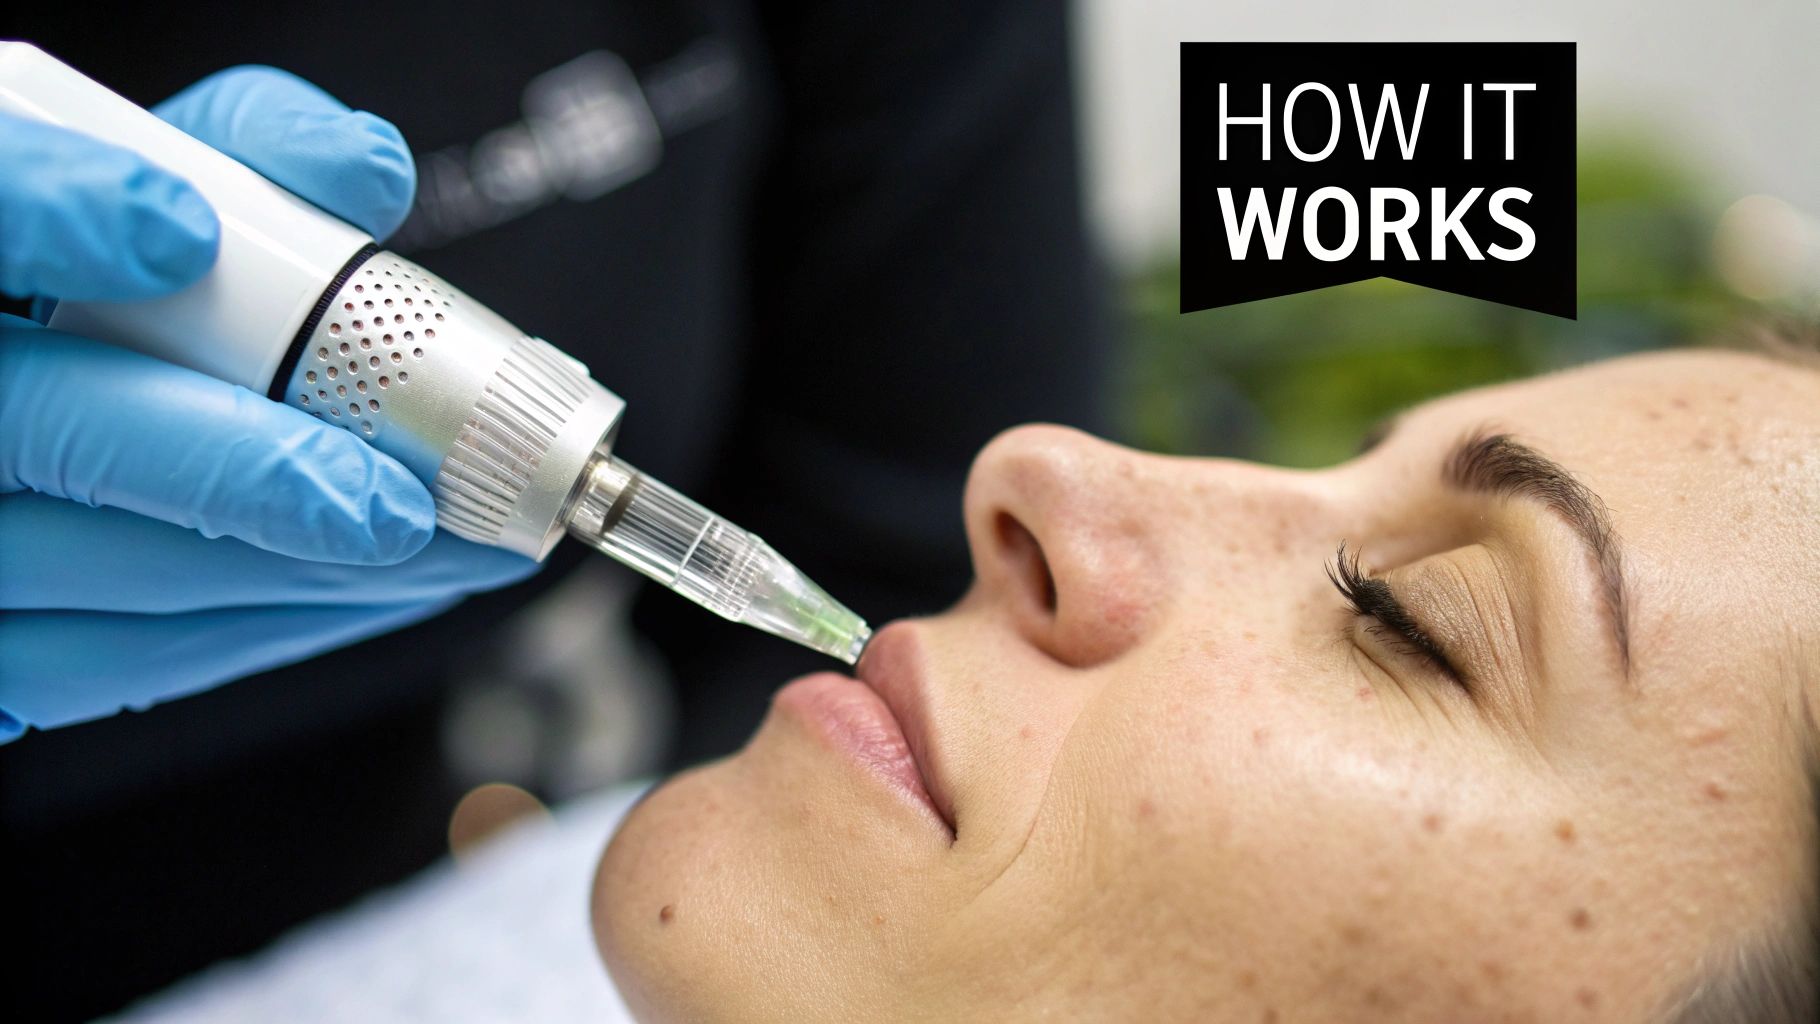
The Microneedling Procedure
This is the heart of collagen induction therapy. Your practitioner will use a professional, automated microneedling pen—a device that looks kind of like a thick pen with a sterile, single-use needle cartridge at its tip.
First, they'll apply a thin layer of a special serum, often one containing hyaluronic acid. This does two things: it helps the device glide effortlessly across your skin and provides a boost of hydration. Then, they will methodically move the pen over the treatment areas, working in small, controlled sections. The pen moves incredibly fast, creating thousands of microscopic vertical channels in the skin. The whole process is surprisingly quick, usually taking only 15 to 20 minutes for the entire face.
Clinical studies have backed up both the safety and effectiveness of these devices. One study, for instance, found that after four sessions averaging just 15.7 minutes each, patients saw a significant improvement in their acne scars. For anyone who likes to see the data, you can explore the full clinical evaluation of automated microneedling devices.
What's really great is that the practitioner can adjust the needle depth during the treatment. They might use a shallower setting on delicate skin, like around your eyes, and go a bit deeper on areas with more prominent scarring, such as the cheeks.
Think of it like a skilled artist using different brush strokes on a canvas. The practitioner fine-tunes the device for different parts of your face to stimulate collagen exactly where you need it most. It’s a controlled, customized approach tailored to your unique scar patterns.
What Happens Immediately After
Once the needling is finished, your skin will be gently cleansed again. It will probably look a bit pink or red—similar to a mild sunburn—and feel warm to the touch. This is totally normal. In fact, it's a good sign! It's the expected inflammatory response that shows your body's healing process has officially kicked off.
To wrap up the session, your practitioner will apply soothing and hydrating products. This typically includes:
- A calming serum: Ingredients like hyaluronic acid or growth factors are applied to deeply moisturize the skin and give the healing process a helping hand.
- A cooling mask: Sometimes, a cool sheet mask is placed on your face for a few minutes to bring down any redness and inflammation.
- Sunscreen: The final, crucial step is applying a broad-spectrum mineral sunscreen. Protecting your fresh, vulnerable skin from the sun is non-negotiable.
This handy visual breaks down the entire process, from the prep in the clinic to the collagen remodeling that continues for weeks at home.
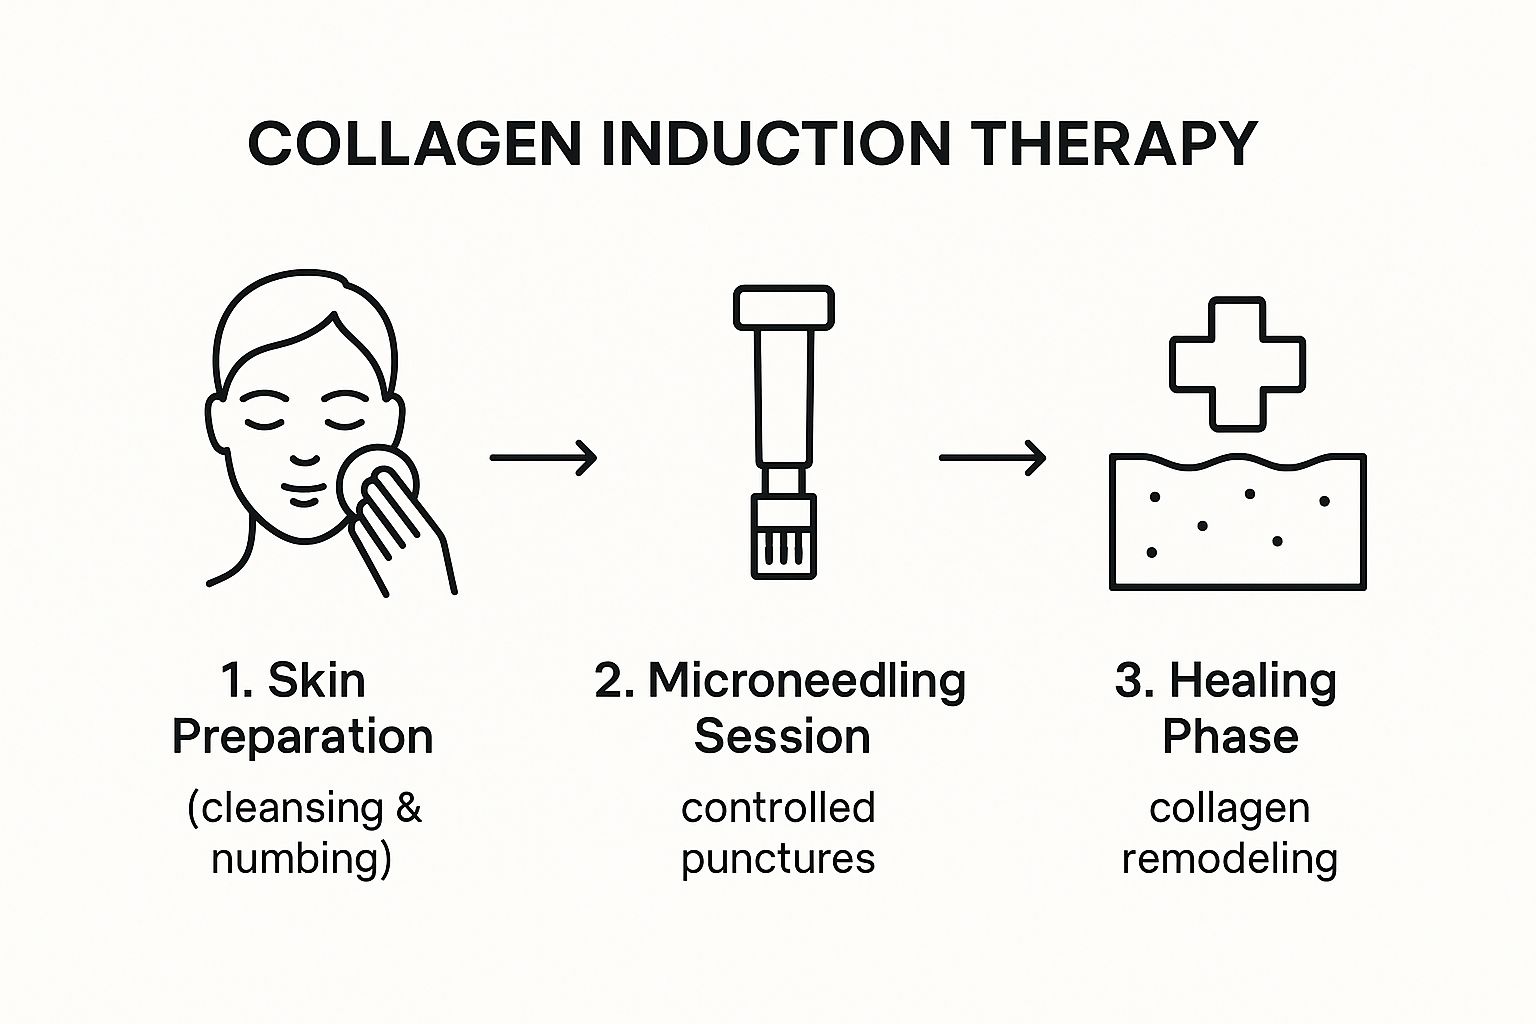
As the infographic shows, the session itself is just the trigger. The real magic happens in the weeks that follow, as that new collagen gets to work smoothing your skin. You’ll leave the clinic with clear aftercare instructions, ready to let your skin begin its renewal.
Are You an Ideal Candidate for This Treatment?

While collagen induction therapy can deliver some truly remarkable results for acne scars, it’s not a one-size-fits-all fix. Figuring out if you’re a good match for the procedure is the essential first step—it's what separates a great outcome from a disappointing or even risky one.
The treatment is a fantastic option for people with atrophic, or indented, scars. Think of rolling and boxcar scars. A huge plus is that it’s generally safe for most skin tones, unlike some laser treatments that can pose a risk of pigmentation problems for darker skin. But it's not just about your scars; your overall health is a major piece of the puzzle.
The Ideal Candidate Profile
So, who gets the best results from microneedling? You’re likely a strong candidate if this sounds like you:
- You have atrophic (indented) scars: The procedure is specifically designed to fill in depressions like rolling scars, boxcar scars, and even some of the shallower ice pick scars.
- You're in good overall health: The entire process relies on your body’s natural healing powers. Good health means a more robust and predictable healing response.
- Your skin is clear of active breakouts: Treating over active acne, cysts, or infections like cold sores is a no-go. It can spread bacteria and make inflammation much worse.
- Your expectations are realistic: You get that this is a journey, not a magic trick. Results are gradual and require a series of sessions. The aim is significant improvement, not airbrushed perfection.
If you’re nodding along, collagen induction therapy could be an excellent choice for you. But there are definitely times when it’s better to pause or look at other treatments.
A professional consultation isn't just a suggestion; it's non-negotiable. It’s where an expert assesses your unique skin, scar type, and medical history to create a personalized roadmap. This ensures the treatment will be both effective and, most importantly, completely safe for you.
When to Pause or Consider Other Options
Your safety always comes first. Certain skin conditions, medications, and health factors are red flags for microneedling because they can increase the risk of side effects or poor healing.
If you have active skin conditions like eczema, psoriasis, or a rosacea flare-up in the area you want to treat, you’ll need to wait. Performing the procedure on already compromised skin can make things worse and seriously interfere with healing.
Your medical history and current medications also play a crucial role. For instance, a history of keloid scarring (where the body overproduces thick, raised scar tissue) is a major contraindication. Because microneedling stimulates new tissue, it could unfortunately trigger new keloids.
Likewise, anyone taking powerful acne medications like isotretinoin (the original brand name was Accutane) must wait. The standard recommendation is to be off the medication for at least six months before having this kind of procedure done.
CIT Suitability Checklist
To make it simple, here’s a quick checklist. Use it to get a feel for whether microneedling is a good fit, or if you should proceed with caution and have a more detailed conversation with a specialist.
| Good Indicators for CIT | Reasons for Caution |
|---|---|
| Indented acne scars (rolling, boxcar) | History of keloid or hypertrophic scarring |
| Good general health and healing ability | Active acne, rosacea, eczema, or skin infections |
| All skin tones (Fitzpatrick I-VI) | Use of isotretinoin (Accutane) within the last 6 months |
| Realistic goals for scar improvement | Pregnancy or nursing |
| No active breakouts in the treatment area | Impaired wound healing (e.g., due to diabetes) |
Ultimately, being upfront and honest about your health during a consultation is the surest way to get the beautiful, healthy results you’re looking for—safely.
What Results to Expect and When to Expect Them

When it comes to collagen induction therapy for acne scars, patience isn’t just a virtue; it’s a core part of the process. This isn't a quick fix. Instead, you're kicking off a gradual, deep-seated regeneration of your skin, and the timeline is dictated by your body's own natural rhythm for producing new, healthy collagen.
Understanding this journey from day one helps you appreciate the subtle shifts as they happen and sets you up for realistic expectations. The real work is happening long before the final results appear on the surface.
The Immediate Aftermath: Days 1-3
Right after your session, don't be surprised if your skin looks and feels like you've had a bit too much sun. Some redness, a feeling of tightness, and even a little swelling are all perfectly normal. This is your skin’s inflammatory phase—a sign that the healing process has officially begun.
Think of it as your body’s first responders arriving on the scene. Your only job during these first few days is to be incredibly gentle. Follow your practitioner’s aftercare advice to the letter, focusing on hydration and obsessive sun protection.
The First Few Weeks: Weeks 1-4
Once the initial redness fades, you’ll likely start to see what many people call the "microneedling glow." Your skin might look brighter and feel a bit smoother to the touch. This isn't the deep scar revision just yet; it's the result of boosted circulation and accelerated cell turnover.
You might also experience some dryness or light flaking as your skin renews itself. That’s a good thing! Keep moisturizing and remember your skin is still extra sensitive to UV rays, so sunscreen is non-negotiable.
The Long-Term Transformation: Months 1-6
This is when the real magic begins. Starting around four to six weeks after your first treatment, your body’s brand-new collagen and elastin start to mature. This fresh, sturdy network of protein fibers gets to work remodeling the deeper layers of your skin, literally plumping up and filling in atrophic scars from below.
It’s a lot like planting a garden. You don't see sprouts the next day. It takes weeks of quiet, underground activity before new growth breaks through the surface. Similarly, collagen induction therapy works beneath the surface for weeks before you see the full, beautiful results.
The improvements will continue to build with each passing month. Scars will look shallower, their edges will soften, and your overall skin texture will become more even. Because the changes are so gradual, I always recommend taking progress photos. It's the best way to truly see how far you've come.
This steady improvement is why a series of treatments is the gold standard. Most clients need 3 to 6 sessions, spaced about four to six weeks apart, to get the best possible outcome. The exact number really depends on how deep and extensive your scarring is. To learn more, check out our guide on how many microneedling sessions are typically needed.
And the clinical data backs this up. One study showed that 95.56% of participants saw a noticeable improvement in their acne scar grade three months after their final treatment. Even more impressive, 31% of those with severe scars improved by two full grades, which represents a massive change in skin texture. You can dive into the clinical details yourself by reading the findings on atrophic acne scars.
The goal with microneedling is always significant, meaningful progress—not unattainable perfection. By trusting the process and understanding the timeline, you can achieve smoother, healthier skin you feel truly confident in.
Post-Treatment Care for the Best Possible Results
What you do after your microneedling session is just as important as the treatment itself. Think of your skin as a freshly seeded lawn—the real work of growing healthy new grass begins after the seeds are planted. Your aftercare routine is how you nurture that growth and ensure you get the smooth, clear results you’re hoping for.
Right after the procedure, your skin is in a uniquely sensitive and absorbent state. Those tiny micro-channels are open, and your body's natural healing response is kicking into high gear. Proper aftercare is all about guiding that process, preventing irritation, and giving your skin everything it needs to build that new collagen.
The First 24-48 Hours: Your Immediate Action Plan
For the first day or two, expect your skin to look and feel like it has a mild sunburn. This is completely normal and a sign that the treatment is working. During this initial window, your goals are simple: keep it clean, keep it calm, and keep it hydrated.
Your practitioner will give you specific products and instructions, but here are the universal ground rules:
- Gentle Cleansing Only: Wash your face with lukewarm water and a mild, non-foaming cleanser. Absolutely no scrubbing, washcloths, or aggressive soaps. When you’re done, gently pat your skin dry with a clean, soft towel.
- Hydration is Everything: Your skin is going to be thirsty. This is the perfect time to apply a pure hyaluronic acid serum, which acts like a big drink of water for your skin and helps the healing process along. Steer clear of any other products with active ingredients for now.
- No Makeup or Heavy Creams: You must wait at least 24 hours before applying any makeup. Keeping the micro-channels clean and free of potential irritants is critical to avoid clogged pores or, worse, an infection.
For a complete breakdown of what to do, check out our in-depth guide on microneedling aftercare instructions that actually work. Following these early steps carefully really sets the foundation for a great outcome.
The Do's and Don'ts for the First Week
As your skin moves past that initial "sunburn" stage, it gets busy with the serious work of repair. Your aftercare routine needs to adapt slightly to protect this vulnerable new skin.
Think of your skin as a construction site for new collagen. The "Do's" are the safety protocols and high-quality materials, while the "Don'ts" are the reckless actions that could ruin the entire project.
What You SHOULD Do:
- Be a Sunscreen Fanatic: Your skin is incredibly vulnerable to sun damage right now. You need to wear a broad-spectrum, mineral-based sunscreen with an SPF of 30 or higher every single day, no excuses. Yes, even if you’re just sitting inside near a window.
- Keep Up the Hydration: Continue using your simple hyaluronic acid serum and follow it up with a gentle, non-clogging moisturizer. This will help manage any dryness or flaking.
- Sleep on a Clean Pillowcase: It’s a small thing that makes a big difference. A fresh pillowcase minimizes your skin's exposure to lingering bacteria while it’s healing.
What You MUST Avoid:
- Active Ingredients: For at least 5-7 days, put away all your powerful skincare. That means no retinoids, vitamin C, exfoliating acids (like glycolic or salicylic acid), or any products containing alcohol. Using them too soon can cause major irritation.
- Heat and Sweat: For the next few days, skip the intense workouts, saunas, hot yoga, and steamy showers. Sweat can irritate your sensitive skin and create a breeding ground for bacteria.
- Picking or Scrubbing: Your skin might start to flake a little. This is normal. Resist the urge to pick at it or use any kind of facial scrub. Just let your skin shed naturally.
Understanding Side Effects vs. Complications
It's crucial to know the difference between what’s normal and what’s a red flag. Mild redness, a bit of swelling, a tight feeling, and even some pinpoint bleeding are all common, temporary side effects. They should start to fade within a day or two.
However, if you notice signs of a potential infection—like worsening pain, pus, skin that feels hot to the touch, or excessive swelling—you need to call your practitioner right away. While complications are rare, they need to be addressed by a professional. By sticking to a strict aftercare plan, you give your skin the best possible chance to heal beautifully and reveal that smoother texture you've been waiting for.
A Few Common Questions About Microneedling for Acne Scars
It's completely normal to have a few lingering questions before you decide to move forward with a treatment like this. Let's tackle some of the most common ones I hear from clients, so you can feel totally confident about your decision.
Is Microneedling Painful?
This is probably the number one question people ask, and I get it—the word "needle" is intimidating! The honest answer is, it really shouldn't be. Before we even start, a powerful topical numbing cream is applied to your skin and given a good 30-45 minutes to take full effect.
Because of this, most people describe the feeling as a light vibration or maybe a faint tickling sensation, almost like an electric toothbrush gliding over the skin. The goal is always to trigger your skin's healing process, never to cause pain.
What’s the Real Difference Between Professional Microneedling and Those At-Home Rollers?
This is a crucial distinction. The difference between a professional treatment and an at-home roller is massive, and it all comes down to safety, control, and ultimately, your results.
- Needle Depth and Precision: In a professional setting, we use a device with adjustable needles that can reach depths of up to 2.5 mm. This allows us to precisely target the dense, fibrous tissue that makes up a scar. At-home rollers have short, fixed needles that barely scratch the surface and can't effectively remodel that deeper scar tissue.
- The Way the Needles Enter the Skin: A professional microneedling pen creates clean, vertical micro-channels. Think of it like a tiny, precise stamp. A roller, on the other hand, drags across the skin, creating angled, tearing punctures. This can actually damage the surrounding tissue and, in some cases, make scarring worse.
- Sterility and Safety: We use a brand-new, sterile, single-use needle cartridge for every single client, every single time. This is non-negotiable and virtually eliminates the risk of infection. Achieving that level of sanitation with a reusable roller at home is incredibly difficult, if not impossible.
Think of it this way: professional microneedling is a controlled medical treatment designed for genuine scar revision. At-home rolling is a very superficial tool that simply can't deliver the same safety or clinical results.
How Much Should I Expect This to Cost?
The investment for collagen induction therapy for acne scars can vary quite a bit, depending on where you live, the clinic's reputation, and how many sessions you'll need. Generally, you can expect a single session to cost somewhere between $200 and $800.
For real, lasting improvement in acne scars, most people need a series of 3 to 6 treatments. It's a journey, not a one-off fix. To make it more manageable, many clinics, including ours, offer package pricing for a full series, which can be a much better value.
Can I Combine Microneedling with Other Scar Treatments?
Absolutely! In fact, for stubborn or more complex scars, a combination approach often yields the best results. We can supercharge your microneedling session by applying treatments like Platelet-Rich Plasma (PRP) or potent growth factor serums right after. The micro-channels allow these powerful ingredients to penetrate far deeper than they ever could on their own.
Depending on your specific needs, we might also create a plan that alternates microneedling with other treatments, like targeted chemical peels or subcision, to tackle the scar tissue from every possible angle.
At Olive Skin Therapy, we know that great skin comes from a plan built just for you. If you're finally ready to see what collagen induction therapy can do for your acne scars, we'd love to help. Explore our advanced skincare services and book a consultation to get started on your personalized journey to smoother skin.