Chemical Peel Downtime: Complete Recovery Guide & Timeline
Chemical Peel Downtime: What's Really Happening to Your Skin
Think of your skin after a chemical peel like a major home renovation. The chemical peel downtime isn't just about waiting around; it's an active, well-defined process of tearing down the old to build something new and better. The chemical solution creates a controlled injury on the skin's surface, which acts as a signal for your body to launch a powerful healing and rebuilding mission. This process isn't about causing harm but rather prompting your skin to shed its tired, damaged outer layers, making way for a fresh, smooth foundation.
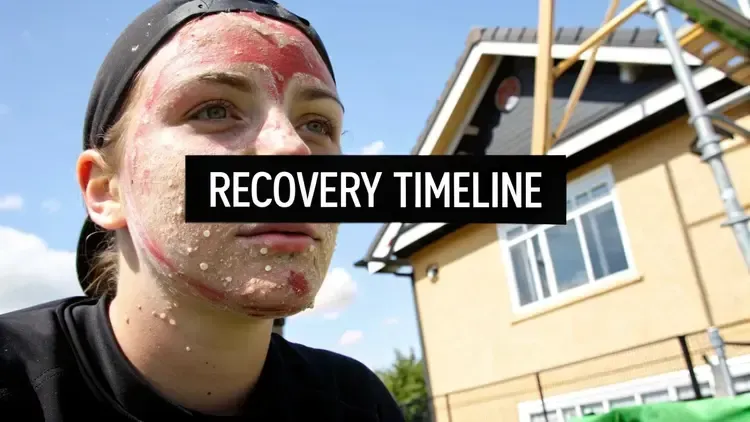
This "demolition" phase is what most people picture when they think of downtime: redness, a feeling of tightness, and eventually, peeling skin. The length and intensity of this period are directly related to the scale of the renovation—or in this case, the depth of your peel.
The Science of Shedding: From Irritation to Regeneration
In the first few days post-peel, your skin is busy responding to that controlled injury. You might feel a bit of tightness or tingling as the outermost layers of skin begin to dry out and get ready to separate. This is a good sign, indicating the peel has successfully dissolved the "glue" holding old, dead skin cells together.
As your body's natural repair crew gets to work, new skin cells start forming underneath the surface. This activity leads to the most noticeable part of chemical peel downtime: the peeling. It’s important to see this not as simple dryness, but as the old, targeted layer of skin making way for the fresh, regenerated skin beneath it. You must resist the urge to pick or pull at the shedding skin, as this can disrupt the delicate healing process and may lead to scarring or uneven pigmentation.
How Peel Depth Dictates Your Recovery Timeline
The type of chemical peel you get is the single biggest factor that determines your recovery schedule. The infographic below clearly illustrates how the average initial downtime changes based on the peel's depth.

As you can see, the downtime increases quite a bit as you go from a superficial to a deep peel, which reflects how extensive the skin's "renovation" project is.
To help you plan, the table below breaks down what you can expect in terms of recovery for light, medium, and deep peels.
Chemical Peel Downtime Comparison by Depth
A comprehensive comparison of recovery timelines, symptoms, and return-to-activity schedules for different peel depths
Peel Type Initial Downtime Makeup Application Return to Work Full Healing Light Peel 1–7 days Typically 1–2 days Immediately to 2 days Around 7 days Medium Peel 7–14 days After 5–7 days After 7–10 days Up to 2-4 weeks Deep Peel 14–21 days After 14+ days After 14–21 days Up to 2-3 months
The differences are significant. A light peel might only require 1 to 7 days of minimal social downtime, with redness and flaking that often allow you to wear makeup the very next day. In contrast, a medium peel bumps this up to 7 to 14 days, involving more obvious swelling, redness, and crusting before the skin starts to flake off.
Deep peels demand the longest recovery, requiring 2 to 3 weeks of dedicated at-home care. Initially, the skin is raw and swollen, needing constant application of protective ointment. For more details on what to expect, the American Academy of Dermatology provides great resources on what to expect after a chemical peel. This tiered structure allows you to match your skin goals with a downtime schedule that works for your lifestyle.
Light Peel Recovery: The Professional's Secret Weapon
Light peels are the ultimate "stealth" treatment for skin rejuvenation. They are often called "lunchtime peels" because the chemical peel downtime is so minimal that you can fit them into a busy schedule without much disruption. Think of it less like a major overhaul and more like a deep, professional spring cleaning for your face. The goal is to clear away dull, old surface cells to reveal a brighter, more refreshed complexion, all without requiring you to hide away for days.
The Subtle Stages of Healing
The recovery from a light peel is a gentle and gradual process. Immediately after your appointment, you might notice a healthy, rosy glow. Over the next 1 to 3 days, your skin may feel a bit tight or dry, much like a mild sunburn. This is the lead-up to the main event: a very light flaking or "micro-peeling." This is often so subtle that it simply looks like a bit of dry skin, which can be easily managed with a good moisturizer.
This minimal downtime is a significant advantage, as confirmed by dermatology experts.

As the guidance shows, a light peel's healing phase is typically between one and seven days, and makeup can often be applied the very next day. This reinforces its status as a convenient, low-downtime option for skin improvement.
Maximizing Results with Strategic Timing
The key to mastering light peel recovery lies in strategic scheduling. Since the most noticeable peeling often happens around day three, you can plan your treatment to minimize any social inconvenience. For instance, scheduling a peel on a Wednesday or Thursday means the most active flaking will likely occur over the weekend. By Monday, you can return to your routine with glowing skin, having sidestepped the most visible part of the healing process.
This approach is especially powerful when undergoing a series of treatments. Light peels deliver their best results cumulatively. A series of 3 to 5 peels, spaced a few weeks apart, can produce effects similar to a more intense peel but without the associated recovery time. If this sounds like the right path for you, it's a good idea to book a chemical peel consultation to create a treatment plan that aligns with your skin goals and personal calendar. This ensures you get the best possible outcome with the least disruption to your life.
Medium Peel Recovery: Navigating The Transformation Phase
A medium peel creates a sweet spot between treatments, delivering more significant results than a light peel but without the intense recovery period of a deep one. Still, the chemical peel downtime for this popular option can be a surprise if you aren't prepared. It's less like a quick spring clean and more like a focused home renovation; the results are impressive, but so is the process. The recovery journey moves through clear stages, starting with tightness and progressing to a period of significant peeling that uncovers your refreshed skin.
Your Day-by-Day Recovery Timeline
Knowing the general progression of healing helps set realistic expectations and can ease any concerns you might have. While everyone's skin heals differently, a medium peel recovery usually follows a predictable schedule.
Days 1-2: The Swelling Phase. Right after your treatment, your skin will probably feel tight, look red, and be quite sensitive, much like a bad sunburn. Swelling is common and tends to peak around 48 hours after the peel. Your main job here is to gently cleanse and moisturize the area exactly as your provider instructed.
Days 3-5: The Peeling Phase. This is where the most visible part of the healing process kicks in. Your skin might darken slightly and feel like paper before it starts to flake and peel away, usually beginning around your mouth and chin. The most important rule here is to let the skin shed on its own. Do not pick, pull, or scrub at the peeling skin, as this can cause scarring or dark spots.
Days 6-10: The Reveal Phase. By this point, the majority of the peeling should be finished. You'll start to see the smooth, new skin underneath. This new skin will be pink and feel delicate. Many people feel ready to go out in public around day seven, though some pinkness or redness may still be present.
Days 10-14+: The Maturation Phase. Your new skin continues to heal and strengthen. The initial pink color will slowly fade, and your final, glowing results will become more obvious. Protecting this vulnerable new skin with diligent sun protection is non-negotiable during this phase and beyond.
Planning for Success
The downtime for medium peels, such as those using trichloroacetic acid (TCA), requires some strategic planning. Peeling generally begins 2 to 3 days after the procedure and can last for about a week, with the first stage of healing taking up to 14 days. Because of this, it's often a good idea to schedule at least a week off from work for a stress-free recovery. You can find more information on how downtime varies by peel type on virginiafacialplasticsurgery.com. By arranging your treatment with this timeline in mind, you can move through the recovery phase confidently and enjoy the beautiful new skin you've been waiting for.
Deep Peel Recovery: The Ultimate Skin Renovation Project
Opting for a deep chemical peel is less of a simple skin treatment and more like signing up for a complete skin renovation. This isn't a quick "lunchtime" procedure; it's a significant commitment that requires careful planning and a dedicated recovery period. The chemical peel downtime is lengthy because the treatment works far beneath the surface to address major concerns like deep-set wrinkles, extensive sun damage, or even precancerous growths. Think of it as demolishing an old, weathered structure to rebuild a stronger, more beautiful one from the ground up.

The First Two Weeks: An Intensive Healing Journey
The initial 2 to 3 weeks are the most demanding part of deep peel recovery, requiring a full stop to your normal daily life. You'll need to stay home and make healing your only priority. Here’s a look at what this intense phase involves:
Initial Sensation: Right after the peel, your skin might feel like it's burning or throbbing.
Swelling and Redness: Expect considerable swelling, especially around your eyes, along with intense redness. The skin will be raw and may form crusts as it begins to heal.
Specialized Care: Your provider will prescribe a strict routine that includes soaking the treated skin, applying a heavy, protective ointment several times a day, and possibly taking pain medication. This is less like a typical skincare routine and more like medical wound care.
During these first few weeks, your home will be your recovery space. Sun exposure is strictly off-limits, as your new skin is extremely fragile. Following your aftercare plan to the letter is essential for ensuring a safe recovery and achieving the best possible outcome.
The Emotional and Long-Term Commitment
Recovering from a deep peel is just as much of an emotional process as it is a physical one. It can be startling to watch your skin undergo such a dramatic and sometimes uncomfortable transformation. Feelings of impatience or anxiety are completely normal. One patient, Hallie, who shared her story after a peel around her eyes, mentioned that even after three weeks, she still had some unexpected skin shedding and dryness. Her experience shows that recovery timelines can differ and patience is key. You can read more about Hallie's eye rejuvenation journey on drdianaponsky.com for a firsthand account.
This long-term commitment doesn't end after the initial healing phase. While you might feel ready for some social events after two or three weeks, the deep redness can linger for several months. Protecting your amazing results means committing to a lifetime of consistent sun protection and using a medical-grade skincare routine. This treatment is a serious investment in your skin, and proper aftercare is how you make sure that investment pays off for years to come.
Recovery Protocols That Actually Speed Up Healing
Successfully getting through your chemical peel downtime is more than just a waiting game. It’s about actively helping your skin’s natural healing process. Think of yourself as the perfect caretaker for your skin, giving it exactly what it needs, right when it needs it. The right aftercare can be the difference between a smooth, predictable recovery and one that is long and complicated. This isn't about using expensive products, but about following a straightforward, science-backed plan for healing.
Your Initial Post-Peel Game Plan
The first 24 to 48 hours are the most important. Your skin is at its most vulnerable, and the main goals are to calm, hydrate, and protect it.
Gentle Cleansing: Put aside your usual cleansers. Use only cool water and a very mild, soap-free cleanser that your provider recommends. When drying, pat your skin with a clean, soft towel—no rubbing at all.
Intense Hydration: Frequently apply a thick, basic moisturizer or a specific post-peel balm. This acts as a protective shield, locking in moisture and protecting your sensitive new skin from things in the environment that could cause irritation.
Sunscreen is Non-Negotiable: At this stage, your skin has no defense against UV rays. A broad-spectrum mineral sunscreen with an SPF of 30 or higher is essential, even if you are only sitting near a window. Reapply it consistently.
Managing the Peeling Phase
Around day three, your skin will likely start to shed. This is a normal part of the process, and your routine needs a small adjustment. You might feel a strong urge to "help" the peeling along, but resisting the urge to pick or pull is the most important rule of recovery. Picking at flaky skin can cause infection, dark spots (hyperpigmentation), and even scarring, which would cancel out the benefits of the peel.
Instead of picking, keep your skin hydrated. This will make the shedding less obvious and more comfortable. Stick with your gentle cleanser and heavy moisturizer. If you experience any irritation, a cool compress can offer great relief. Seeing your skin in this condition can be unsettling, but remember this shedding is a good sign that fresh, healthy skin is emerging. To see why patience during this phase is so important, you can view some incredible transformations in our guide on chemical peel before and after results.
To help you navigate the first week of recovery, the table below provides a general aftercare plan.
Phase-by-Phase Aftercare Protocol
Detailed aftercare instructions organized by recovery phase, including product recommendations and activity restrictions.
Recovery Phase Duration Key Activities Products to Use Activities to Avoid Inflammatory Phase Days 1-2 Soothe, hydrate, and protect the skin. Focus on creating a calm environment for healing to begin. Gentle, soap-free cleanser, thick barrier-repair moisturizer, and broad-spectrum mineral SPF 30+. Direct sun exposure, exfoliants (physical or chemical), hot water, steam, and makeup. Peeling Phase Days 3-5 Keep skin consistently hydrated to manage flaking. Do not pick or pull at shedding skin. Continue with gentle cleanser, moisturizer, and SPF. Apply moisturizer more frequently if needed. Picking, pulling, or scrubbing peeling skin. Using harsh products, excessive sweating, or saunas. Remodeling Phase Days 6-10+ Protect the delicate new skin as it becomes fully visible. Slowly reintroduce regular skincare products. Gentle cleanser, moisturizer, SPF. Can begin to reintroduce gentle, hydrating serums as skin tolerates. Strenuous exercise (initially), retinoids, strong acids (like AHAs/BHAs), and professional treatments.
Following this structured protocol is key. The Inflammatory Phase is all about calming the initial reaction, the Peeling Phase requires patience and hydration, and the Remodeling Phase is focused on protecting the brand-new skin you've revealed. Each step is designed to support your skin for the best possible outcome.
Strategic Recovery: Minimizing Your Chemical Peel Downtime
While a certain amount of recovery is a natural and necessary part of the skin renewal process, you have more influence over your chemical peel downtime than you might realize. The goal isn't to find an impossible shortcut but to use proven strategies that support your skin's healing. Taking a proactive approach can make a real difference in how quickly the most visible signs of recovery, like redness and peeling, subside.
Pre-Treatment Preparation
A successful recovery journey actually starts before your appointment. Preparing your skin ahead of time is one of the most effective things you can do. Your provider may recommend a specific skincare regimen a few weeks before your peel to condition the skin. Think of it like training for a marathon—proper preparation leads to a better, more predictable performance and a smoother recovery.
This preparation isn't just topical. Supporting your body from the inside out by eating antioxidant-rich foods and staying hydrated builds a strong foundation for efficient healing.
Advanced Recovery Techniques
Beyond the standard aftercare instructions, a few advanced methods can help speed things up, which is especially helpful if you need to be back in the public eye quickly.
LED Light Therapy: This professional treatment uses targeted wavelengths of light to calm inflammation and encourage cellular repair. It can often shorten the period of intense redness by a few days.
Specialized Healing Products: Using post-procedure serums with ingredients like growth factors or extra hyaluronic acid creates the perfect environment for your skin to regenerate.
Lifestyle Factors: Simple daily habits can have a surprisingly large impact. Sleeping with your head elevated on an extra pillow can reduce swelling. Managing stress and getting 7-9 hours of quality sleep each night directly fuels your body’s natural repair cycles.
By combining diligent pre-treatment care with smart recovery techniques, you can effectively manage and potentially shorten your downtime. Creating a comprehensive skincare strategy with a professional can support your skin's health before and after procedures. To build a plan tailored to your needs, consider booking a custom facial consultation to explore your options.
Planning Your Peel: Timing and Lifestyle Mastery
Smartly planning for your chemical peel downtime is about more than just finding a free weekend on your calendar. It's about strategically aligning the treatment with your life's natural rhythm to get the best results with the least amount of fuss. A successful recovery relies as much on your environment and schedule as it does on aftercare products. Thinking through your commitments beforehand is the secret to a stress-free healing process.
Aligning Treatment with Your Life
Before booking your peel, take an honest look at your upcoming schedule. Do you have a big presentation at work, a friend's wedding, or a family vacation on the horizon? Even for a medium peel, it’s a good idea to schedule at least 7 to 10 days of social downtime. Think of it as a personal retreat for your skin.
Consider these aspects of your daily routine:
Work Commitments: Can you comfortably work from home? If your job requires you to be client-facing, schedule your peel at the start of a planned vacation or a long weekend. This allows the most intense peeling days to happen when you're away from the office.
Social Calendar: Avoid scheduling your treatment right before important social events. Even after the most visible peeling subsides, some redness can linger for a few weeks. You want to show off your results, not your recovery.
Support System: For deeper peels, you’ll need some help. It’s wise to arrange for a friend or family member to assist with errands and other responsibilities during the first few critical days of healing.
Seasonal and Environmental Considerations
The time of year you choose for your peel can make a big difference in your recovery. Many people opt for autumn or winter for more intensive treatments. The weaker sunlight and cooler weather make it easier to stay indoors and avoid the UV exposure that could compromise your beautiful new skin.
One patient, Hallie, shared her experience and noted that her skin felt unexpectedly dry even three weeks after her peel. Her journey, which you can read about in a detailed patient experience blog on drdianaponsky.com, shows that healing isn’t always a straight line and can have its own unique timeline.
Your home environment is also a key player. Using a cool-mist humidifier can add much-needed moisture to the air, helping to soothe tight, dry skin. Preparing in advance by having gentle cleansers, prescribed ointments, and fresh, soft towels ready will make your recovery that much more comfortable. By preparing both your schedule and your space, you create the ideal conditions for a smooth, successful healing journey.
For personalized advice on how to best prepare for your treatment and achieve radiant, healthy skin, schedule a consultation with Olive Skin Therapy. We can help you create a plan that fits your life and skin goals perfectly. Book your appointment today!